Shameless plug: With the best free educational resources (Raw-U), the most robust free brewing tools, and the most outstanding organic scobys, kombucha kits, tea blends, flavoring blends & more, we can help you reach your brewing goals. So check out our products — that’s an order, Booch! 😉 #rawbrewingco #ilikeitraw
Primary Fermentation (F1) Brewing Guide - The RBC System
Make Brewery Quality Booch Every Time w/ The Raw Brewing Co. System!
Click here to download our Primary Fermentation (F1) Instructions printable pdf.
Preliminary Notice
For those starting with an 8oz SCOBY, we strongly recommend initiating your brewing journey with a ½-gallon batch. While it is possible to brew a 1-gallon batch, it will take approximately twice as long and significantly increase the risk of failure. Setting yourself up for success from the get-go will ensure a smoother, more enjoyable brewing experience.
Important Notes
- Following OUR Instructions: We cultivate cultures high in gluconobacter and low in acetobacter, which necessitates maintaining proper temperature. Just as you would follow the specific instructions on a brownie mix, it is essential to adhere to our guidelines, even if you have prior brewing experience.
- Temperature: Always maintain between 74-84°F to prevent mold and ensure optimal fermentation. Cold equals mold! If you cannot maintain a temperature of at least 74°F, a heat mat will be required for successful fermentation.
- Resources: For additional detailed videos, tutorials, directions, and learning tools, go to Raw University. Please also checkout our other Free Brewing Tools & Resources.
Ingredient Usage Guidelines
| Ingredient Usage Guidelines (adjust as desired) | ||||
| Batch Size | 1/2 Gallon | 1 Gallon | 2 Gallons | 5 Gallons |
| Filtered Water | ~7 Cups | ~3.5 Quarts | ~1.75 Gallons | ~4.5 Gallons |
| Tea | 2 tablespoons | 4 tablespoons | 1/2 cup | 1 cup |
| Sugar | 1/4-1/2 cup | 1/2-1 cup | 1-2 cups | 2.5-5 cups |
Preparation Checklist
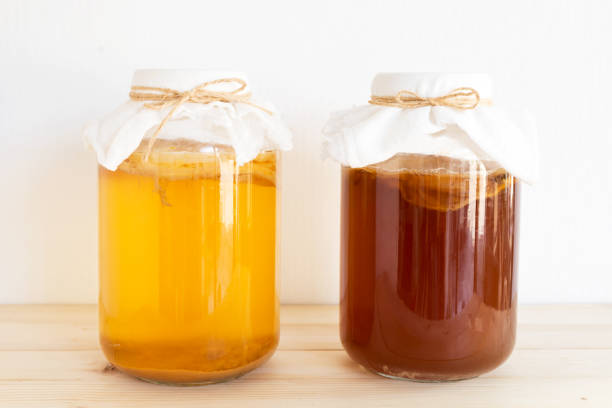
For a successful brew using our GAIA or Honey SCOBY, here's what you'll need:
- Filtered water: 7 cups for a ½-gallon batch or 3.5 quarts for a 1-gallon batch
- Sugar or Honey: ¼-½ cup for a ½-gallon batch or ½-1 cup for a 1-gallon batch. Please use the full recommended amount of sugar or honey in your initial batch to facilitate optimal culture reactivation.
- Kombucha.com certified organic loose leaf tea: 1.5-2 TBSP for a ½-gallon batch or 3-4 TBSP for a 1-gallon batch (or 8 standard organic tea bags). Organic tea is imperative for the health of your culture.
- Drawstring filter bags or a strainer (if using kombucha.com or other whole leaf tea)
- Fermentation Vessel: ½-gallon, 1-gallon, or larger jar
- Coffee filter
- Elastic band
Highly Recommended:
- pH Test Strips
- Thermometer
- Fermentation Heat Mat (your brew will finish much faster)
- Brew Log (available free with our other Free Brewing Tools & Resources)
Pro Tip: If you want to brew consistently like a pro, these items are essentials. And a heat mat is maybe the best brewing investment you'll ever make.
Step-by-Step Brewing Guide
Step 1: Brew Preparation
-
Boil water and sugar, remove from heat, add tea, and steep for 5-20 minutes (as desired for preferred flavor). After steeping, remove tea bags or strain.
-
Cool the brew to 74-84°F before adding your SCOBY and starter liquid. It's okay to cool it in the fridge; this is the only stage in the process where the brew can be cold. Be sure to cover the brew during cooling (a clean lid is crucial here, because as steam rises, it causes condensation and drips back into the brew).
- Make sure your fermentation vessel is clean "ideally sterilized" before adding your brew. Maintaining the cleanliness of your vessel is crucial to the success of your kombucha. After your initial batch, provided there are no signs of mold or contamination, it is not necessary to clean your vessel before every brew. To learn more about what types of vessels and utensils are acceptable for brewing kombucha, and/or how to properly clean them, checkout our post on Kombucha Equipment & Cleanliness
Pro Tip: Speed up cooling by using half the water for boiling and adding the rest later -- ideally chilled to save even more time.
Step 2: Adding the SCOBY
-
Shake the SCOBY package to mix in any sediment (it is important for your brew).
-
Add the SCOBY and starter liquid to the cooled brew.
-
If you have pH strips, use them to ensure the pH is between 4-4.5. Use a clean spoon to take a sample instead of dipping the strip directly into the brew. To learn more about kombucha and pH, checkout our post on Kombucha & pH. For a detailed tutorial on how to properly use RBC pH test Strips, checkout our guide here.
For Your First Batch:
- Starting pH: While it is generally recommended to start with a pH between 4.0 and 4.5, it's perfectly fine if yours starts below 4.0 (this is by design on our part). Our cultures are cultivated to establish a strong foundation from the outset, ensuring a successful first brewing experience.
For Subsequent Batches:
- Ideal pH Range: Aim to start your brew with a pH between 4.0 and 4.5. Most pro brewers start at 4.0 and finish at 3.0.
- Starter Liquid Calculator: Utilize our calculator to determine the precise amount of starter liquid you'll need to hit the sweet spot in the pH range.
Remember, maintaining the right pH not only ensures the safety of your brew but also contributes to the flavor profile.
Pro Tip: Clean tongs are always better than clean hands to handle a SCOBY.
Step 3: Fermentation
-
Cover the vessel with a coffee filter and elastic band and place it in a well-ventilated area. Never use cloth or muslin covers -- learn why here.
-
Place it in a well-ventilated area, away from direct sunlight, maintaining a temperature between 74-84°F. Remember, cold equals mold — and no, 73°F is not sufficient; your brew is not the exception!
- Ferment for 5-10 days, adjusting duration based on the flavor preference, the progression of the fermentation, and pH.
Pro Tip: Warmer temps better prevent mold and achieve quicker fermentation. It's crucial to adhere to the temperature guidelines to ensure the success of your brew.
Step 4: Finalizing Your Brew
-
Remove the new SCOBY and save it along with 1-2 cups of the finished kombucha for your next 1-gallon batch.
- Properly store the new SCOBY and the starter liquid until you are ready to use them for the next batch. Learn how to do this here.
Pro Tip: Refer to our Starter Liquid Calculator for precisely how much starter liquid to use for your next brew (for batches of any size).
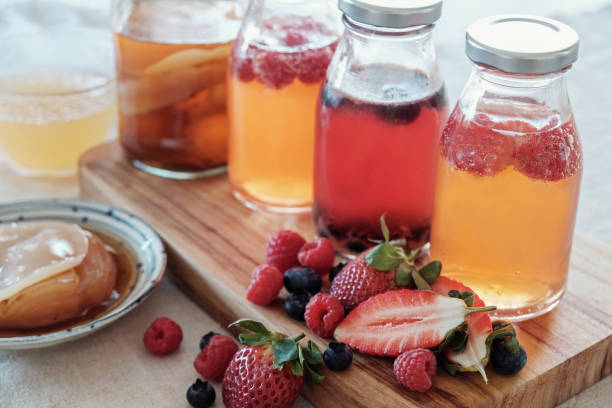
Optional: Flavoring & Secondary Fermentation
Enhance your brew with Kombucha.com Brew Booster™ or your favorite ingredients, then bottle it for secondary fermentation (F2). Find F2 instructions here.
Happy Brewing, Booches! Enjoy your creation and welcome to the RBC family!
Leave a comment